Eatery Toolkit by KangoMedia comes with PayPal Standard built-in. PayPal Standard is the basic PayPal account. The following information is needed in order to process payments successfully with PayPal Standard.
1. PayPal Address
The first required data is the PayPal email address. It is required to use the address that is associated with your PayPal account.
2. PayPal Identity Token
Next required data is the PayPal identity token. This is required in order for payment records to be automatically marked as “Complete” immediately after purchase.
Follow the steps below that will help you to obtain the PayPal identity token:
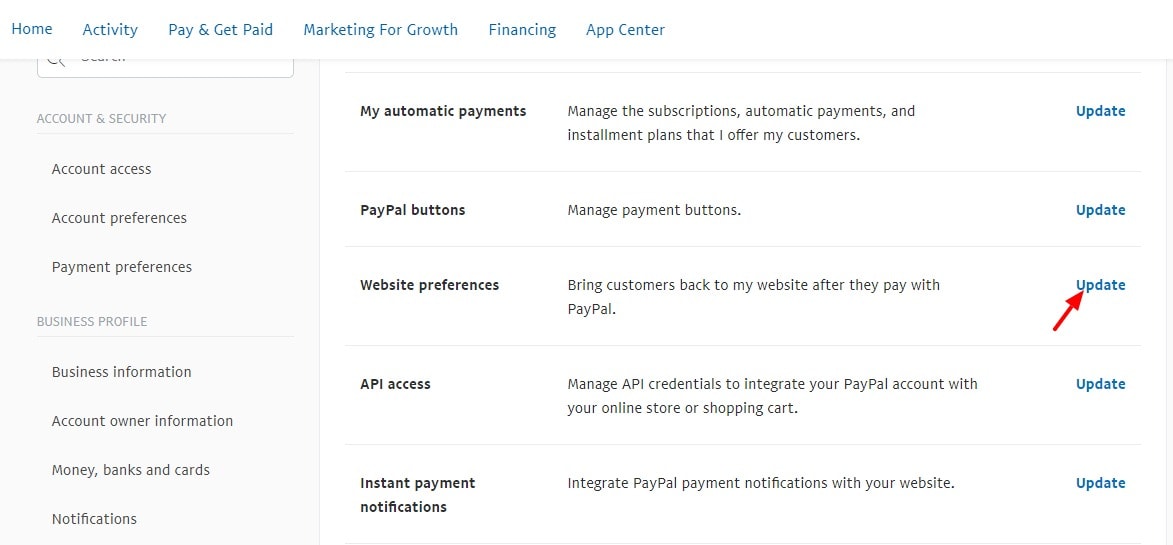
Log in to your PayPal account. Hover over your profile name in the upper right corner of the screen and select Account Settings. Under the Products & Services heading, click on Website payments on the left side of the screen. Click the Update link next to Website Preferences.
Set Auto Return to On
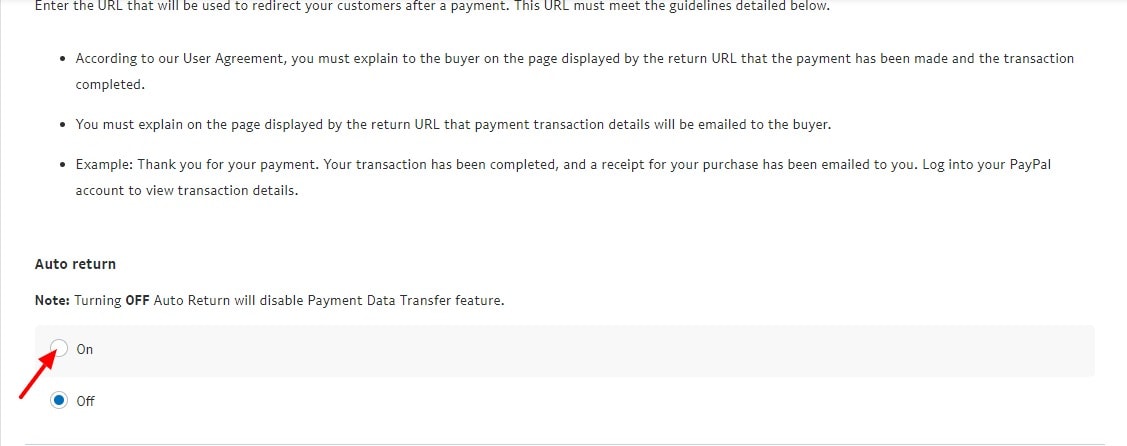
For the return URL, enter your website URL (https://yourdomain.com). In Payment Data Transfer, click the On option. Click Save.
Your PDT identity token should now be visible in the Payment Data Transfer section on the page.
IPN Settings
The IPN (Instant Payment Notification) allows PayPal to communicate with your store and mark transactions as complete, failed, refunded, etc. It will automatically be configured when using PayPal Standard. But you need to confirm whether it is enabled in your PayPal account or not.
How to set up IPN:
-> Log in to your PayPal account.
-> Click on your profile name that is on the top right corner and you will get a dropdown. Select Account settings. On the account settings page, scroll down the page and look for Products and Services, under that select Website Payments option.

-> Find the option of Instant Payment Notification. Click on update link to integrate PayPal payment notification with your website.

-> Select Choose IPN Settings button on that page.
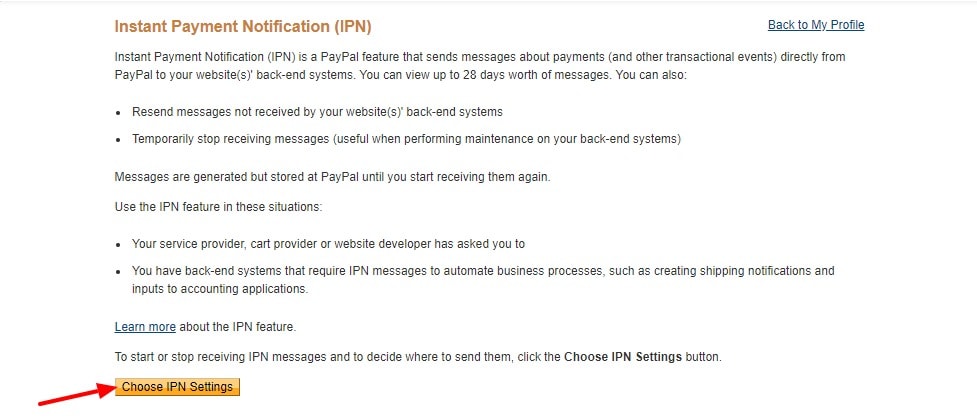
-> PayPal sends IPN messages to the URL that you will mention in the Notification URL. To start receiving IPN messages, enter the notification URL (https://yourdomain.com), and select Receive IPN messages below. To temporarily stop receiving IPN messages, select Do not receive IPN messages below. PayPal continues to generate and store IPN messages until you select Receive IPN messages again or turn off IPN. Click on Save button, to save your entered notification url.

3. API Credentials
PayPal API Keys allow the communication between your store and PayPal to be more reliable and to be direct. This requires API Keys for both, Live and Test.
Creation of Live Keys:
You need to visit https://developer.paypal.com/docs/archive/nvp-soap-api/apiCredentials/#creating-an-api-signature. Click on log in to Dashboard button that is present on the right top menu.

Then, log in to your normal PayPal account. Once you have successfully logged in, visit paypal.com, select account settings option that is available under your name at the top right corner.

Moving to the account settings page, you need to click on update option that is available beside API access.
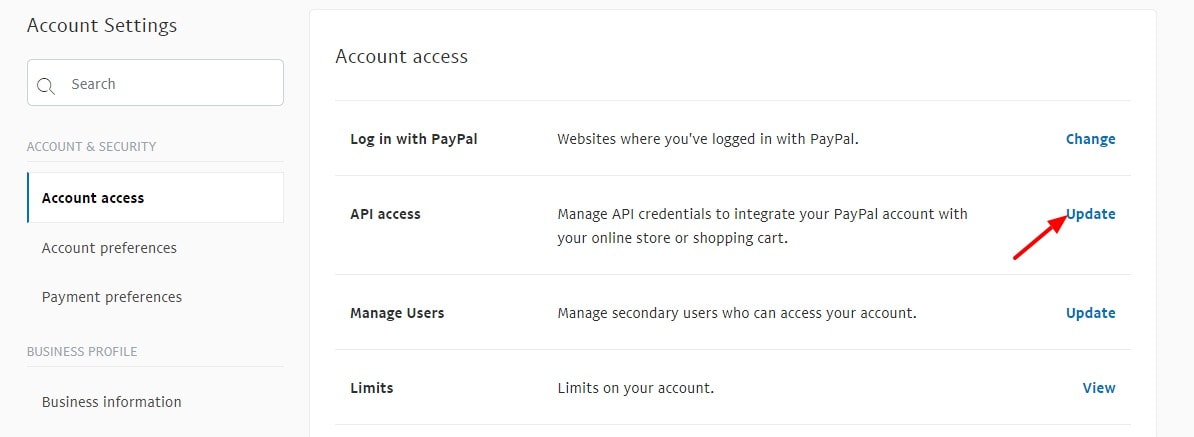
On the Next page, scroll down to the page and you will an option of Manage API credentials under the section NVP/SOAP API Integration.

It will take you to the page where you can Request API Credentials, please select the option of Request API Signature and click on Agree and Submit button.
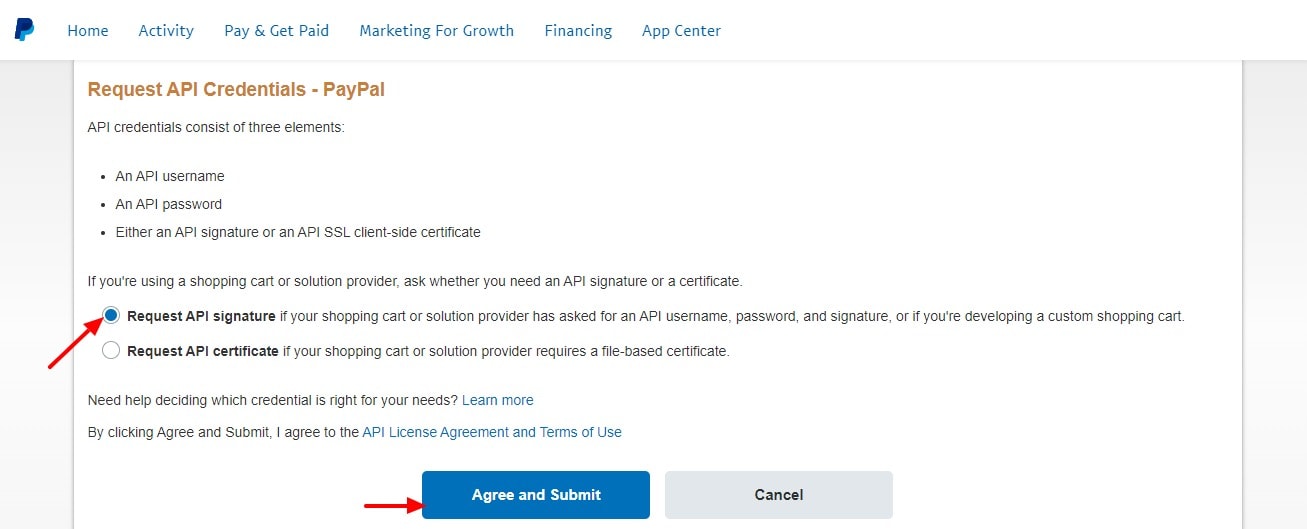
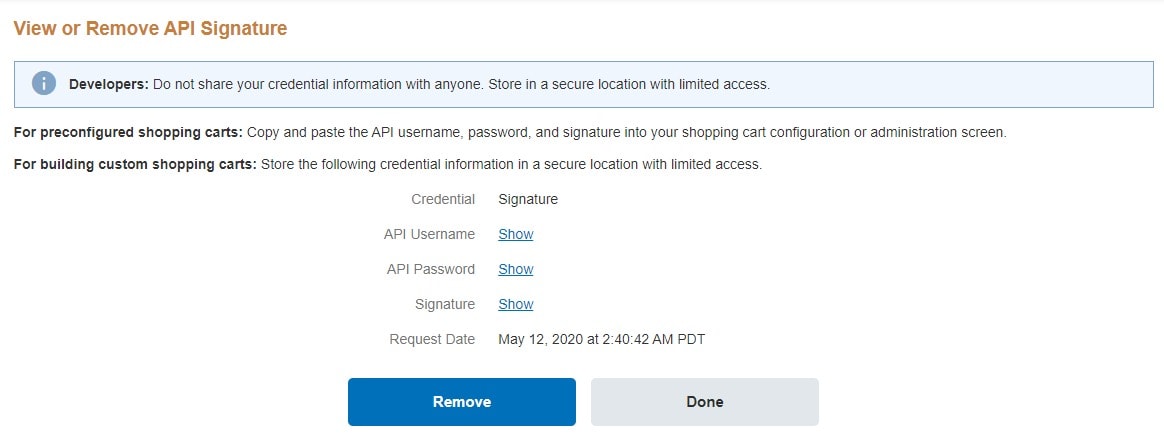
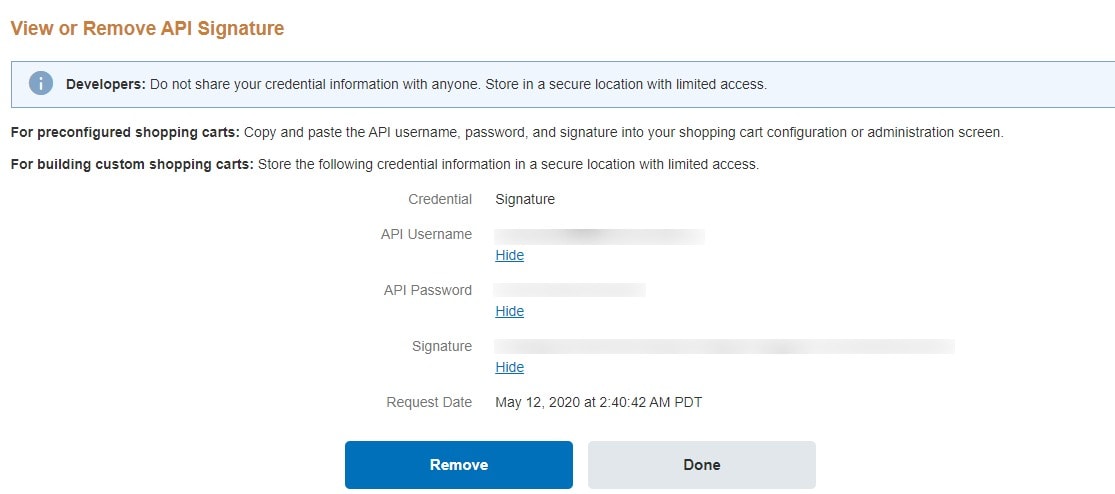
Moving on to the next page, you can find a box labeled as Request API Signature. You need check that radio button and then click on Agree and Submit. On the next page you will have a list of:
- API Username
- API Password
- API Signature
A show link is attached to each option. Clicking show will reveal the details for each.
